
AUDIO / VIDEO INSTRUCTIONS
Below find the instructions on how to use our AV systems in the College of Music.
For support help or demonstrations click HERE.
- Recital Hall & Choir Room
- Before your class
-
The AV equipment in the AV rack is designed to be “on” permanently. There is no “off” switch.
-
The "Epson" remote control for the projector is attached to the AV rack in each space. Point the remote at the projector and press the “on” button to turn on the projector (you will hear a quiet "beep"). Note that you may have to wait 1-2 minutes for the projector to warm up before seeing any image on the screen.
-
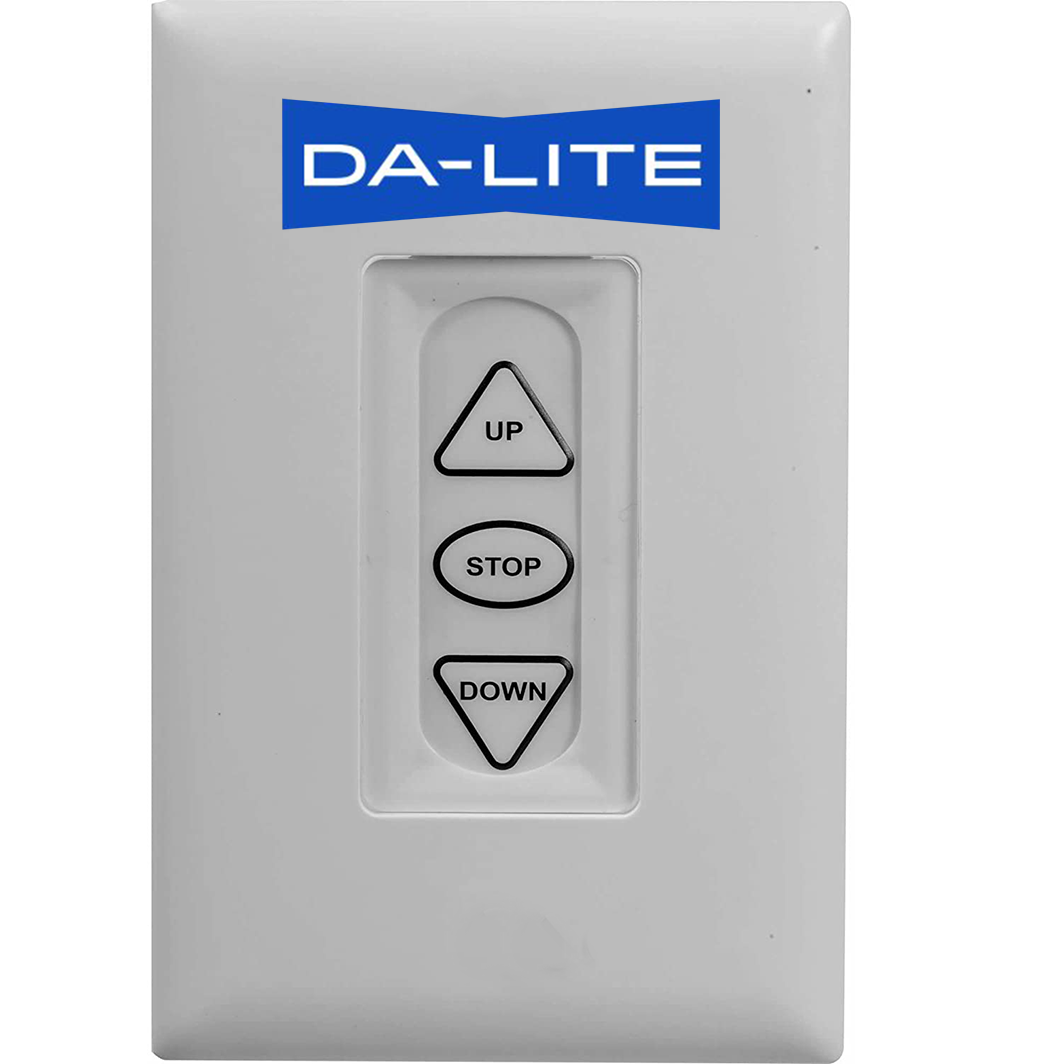
Use the control switch next to the AV rack to lower the screen. Note that it will stop by itself when reaching the bottom.
- Wireless Microphones
Please see the staff in the computer music lab to check out a wireless microphone or two as needed. You may be asked for your EUID or student / faculty ID. Lab hours of operation for equipment checkout can be found at: https://lab.music.unt.edu/hours
-
For the Recital Hall : 2 handheld wireless mics and 2 clip-on mics with belt packs are available.
-
For the Choir Room: 2 handheld wireless mics are available.
-
Turn on the microphone. It will automatically connect to the audio system.
-
You can adjust the volume on the AV rack in the back of the hall (Inputs 1-2).
Note that the microphones are primarily used so that Recording Services can capture your lecture recital. You do not need to be loud in the hall. Ask a friend in the hall to listen to your mic-check and try to aim for a good acoustic balance. If your mic is too hot (i.e. volume is too high) the audience will hear loud popping sounds and microphone handling noises which can be quite distracting.

-
-
- Connecting wirelessly with your laptop or handheld device
You can use your laptop or handheld device to connect wirelessly to the system. Please follow the steps below: (If you wish to stream HQ/stable video or audio content only connect using HDMI)
- macOS: AirPlay Option
If you are experiencing any AirPlay connection problems, Apple recommends disabling your Bluetooth, keeping your software updated, and checking that the network has a strong uninterrupted signal. Older macbooks with the first version of AirPlay might not work at all. Use the "Client App Option" method or connect physically if that is the case.
-
Connect your laptop to the desired WIFI:
-
“Choir_Room-Pro-5G” for the Choir Room. (Don't use Choir_Room-Pro-2.4ghz)
-
“Recital_Hall” for the Recital Hall.
-
-
Input the WiFi password ____
-
Choir Room: Choir_Room
-
Recital Hall: Recital_Hall
-
-
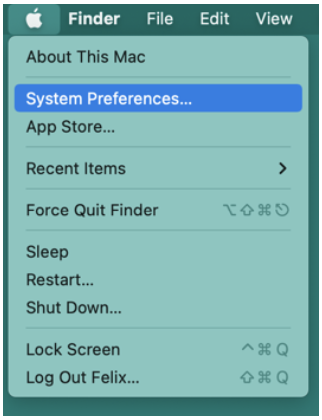
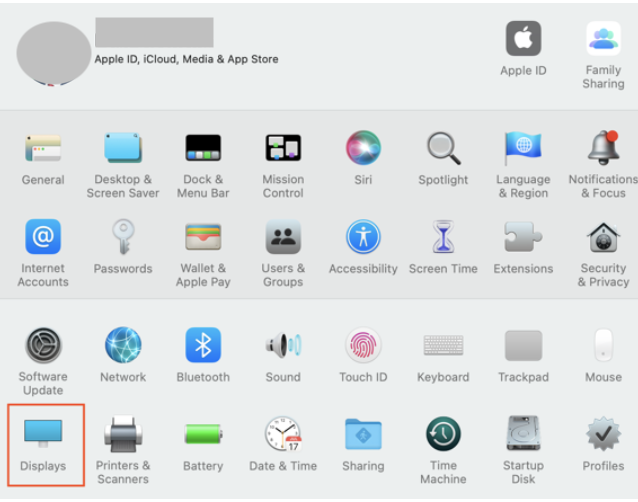
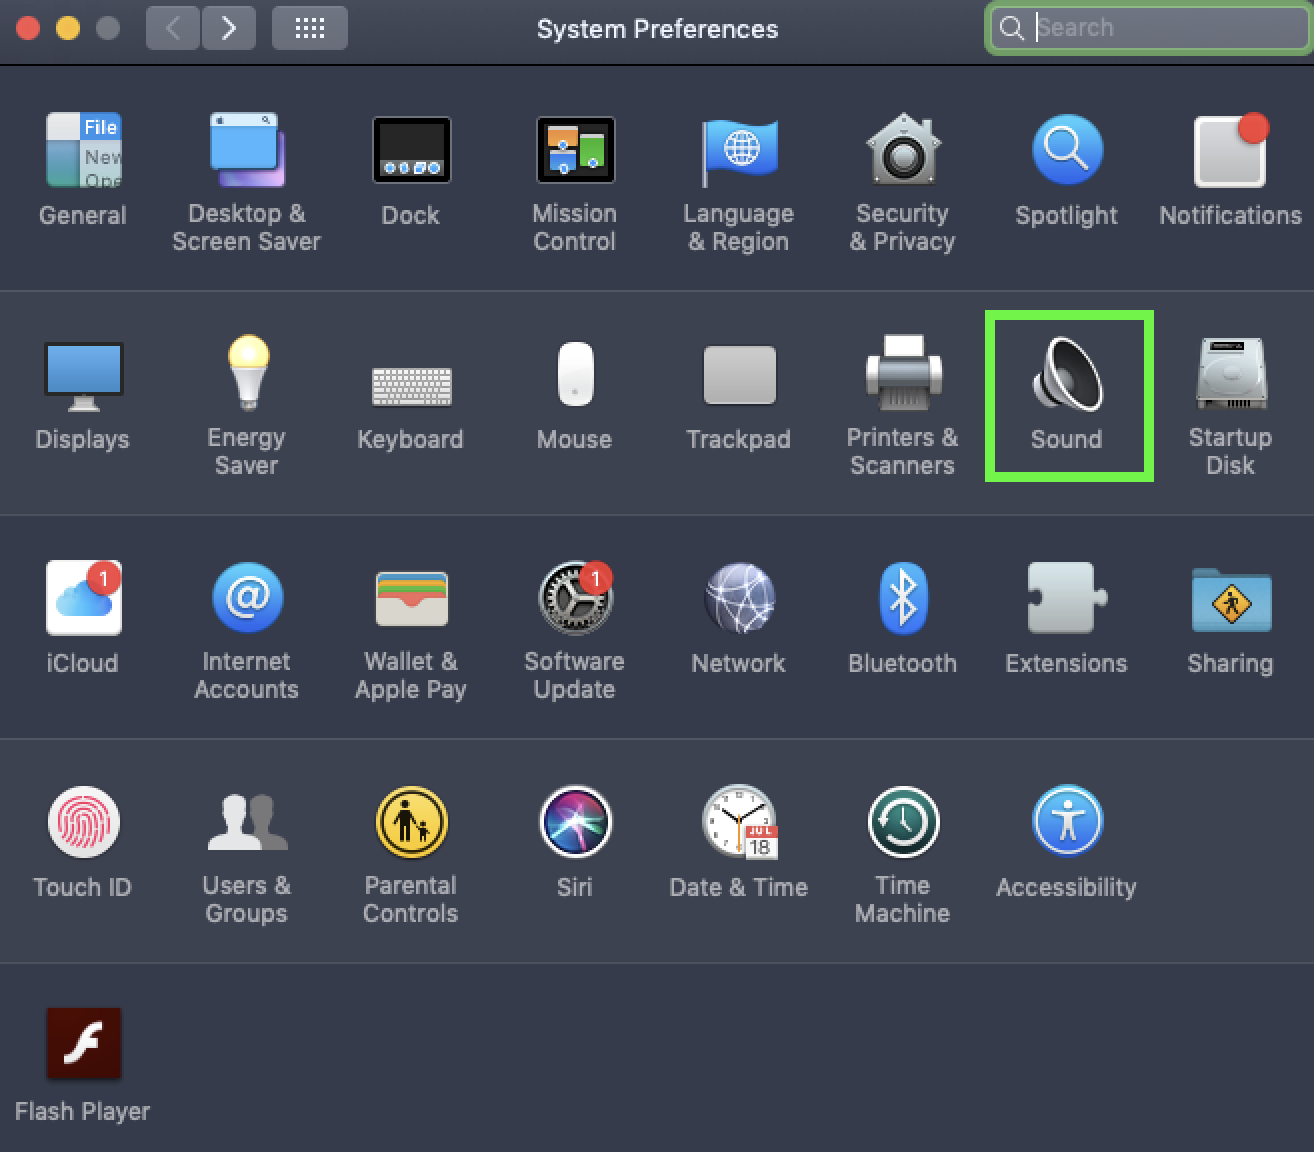
In order to project your display, Click on the Apple logo and select “System Preferences.”:
-
-
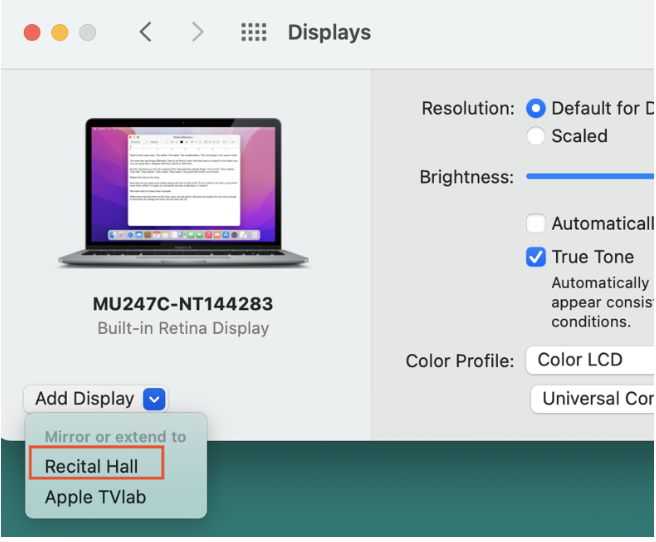
Select "Displays".
-
Click on “Add Display” and select “Recital Hall” or “Choir Room.”
-
-
For more info visit How to AirPlay
-
-
Wait for 5-10 seconds until the following display appears on your laptop/tablet screen.
-
-
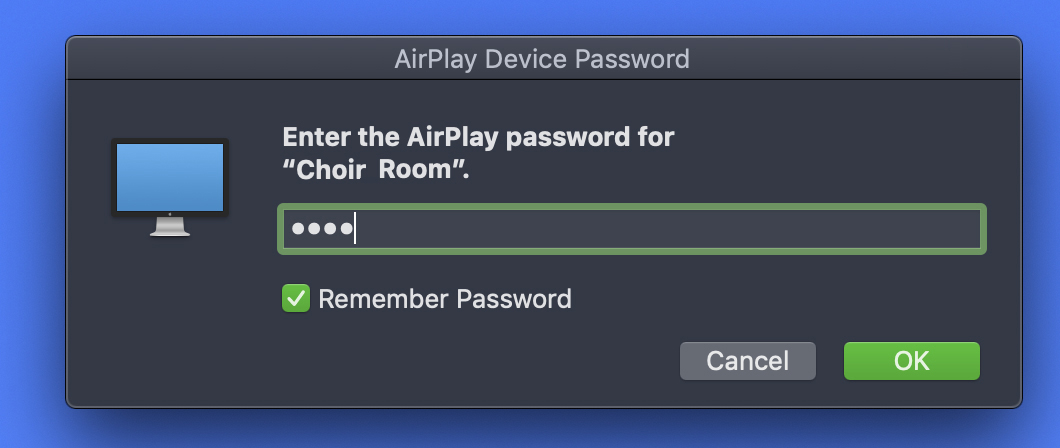
Enter the 4-digit number from the screen in the Recital Hall or Choir Room. After 5-10 seconds your laptop/tablet screen will be mirrored on the large screen.
-
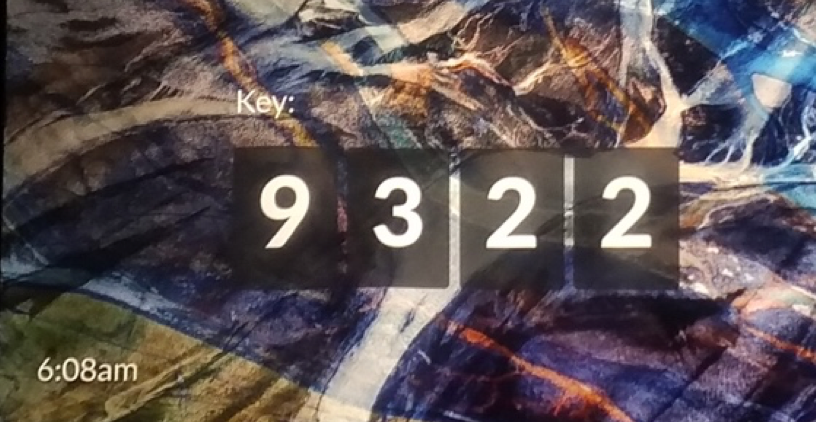
Note: Very occasionally the code might not display in big letters, but it will still show either at the bottom of the screen or at the top left in a smaller font size.
-
After you enter the password, you can mirror the screen of your laptop and project on the large screen. Students are able to do the same as needed. To change the screen resolution go into your macOS display settings.
-
You can adjust the volume of the hall speakers from your laptop.
If you need additional volume you can do so by increasing the “Laptop" volume knob on the A/V rack Mixer. Note that the knobs may change so look carfully at the mixer to identify where the "Laptop" knobs (Left + Right) are located.
-
- macOS: Client App Option
Using the Client App will enable the user some additional features such as moderator mode, selectively hiding your desktop, multiple users at the same time etc. Mersive company recommends using the client app over other methods.
-
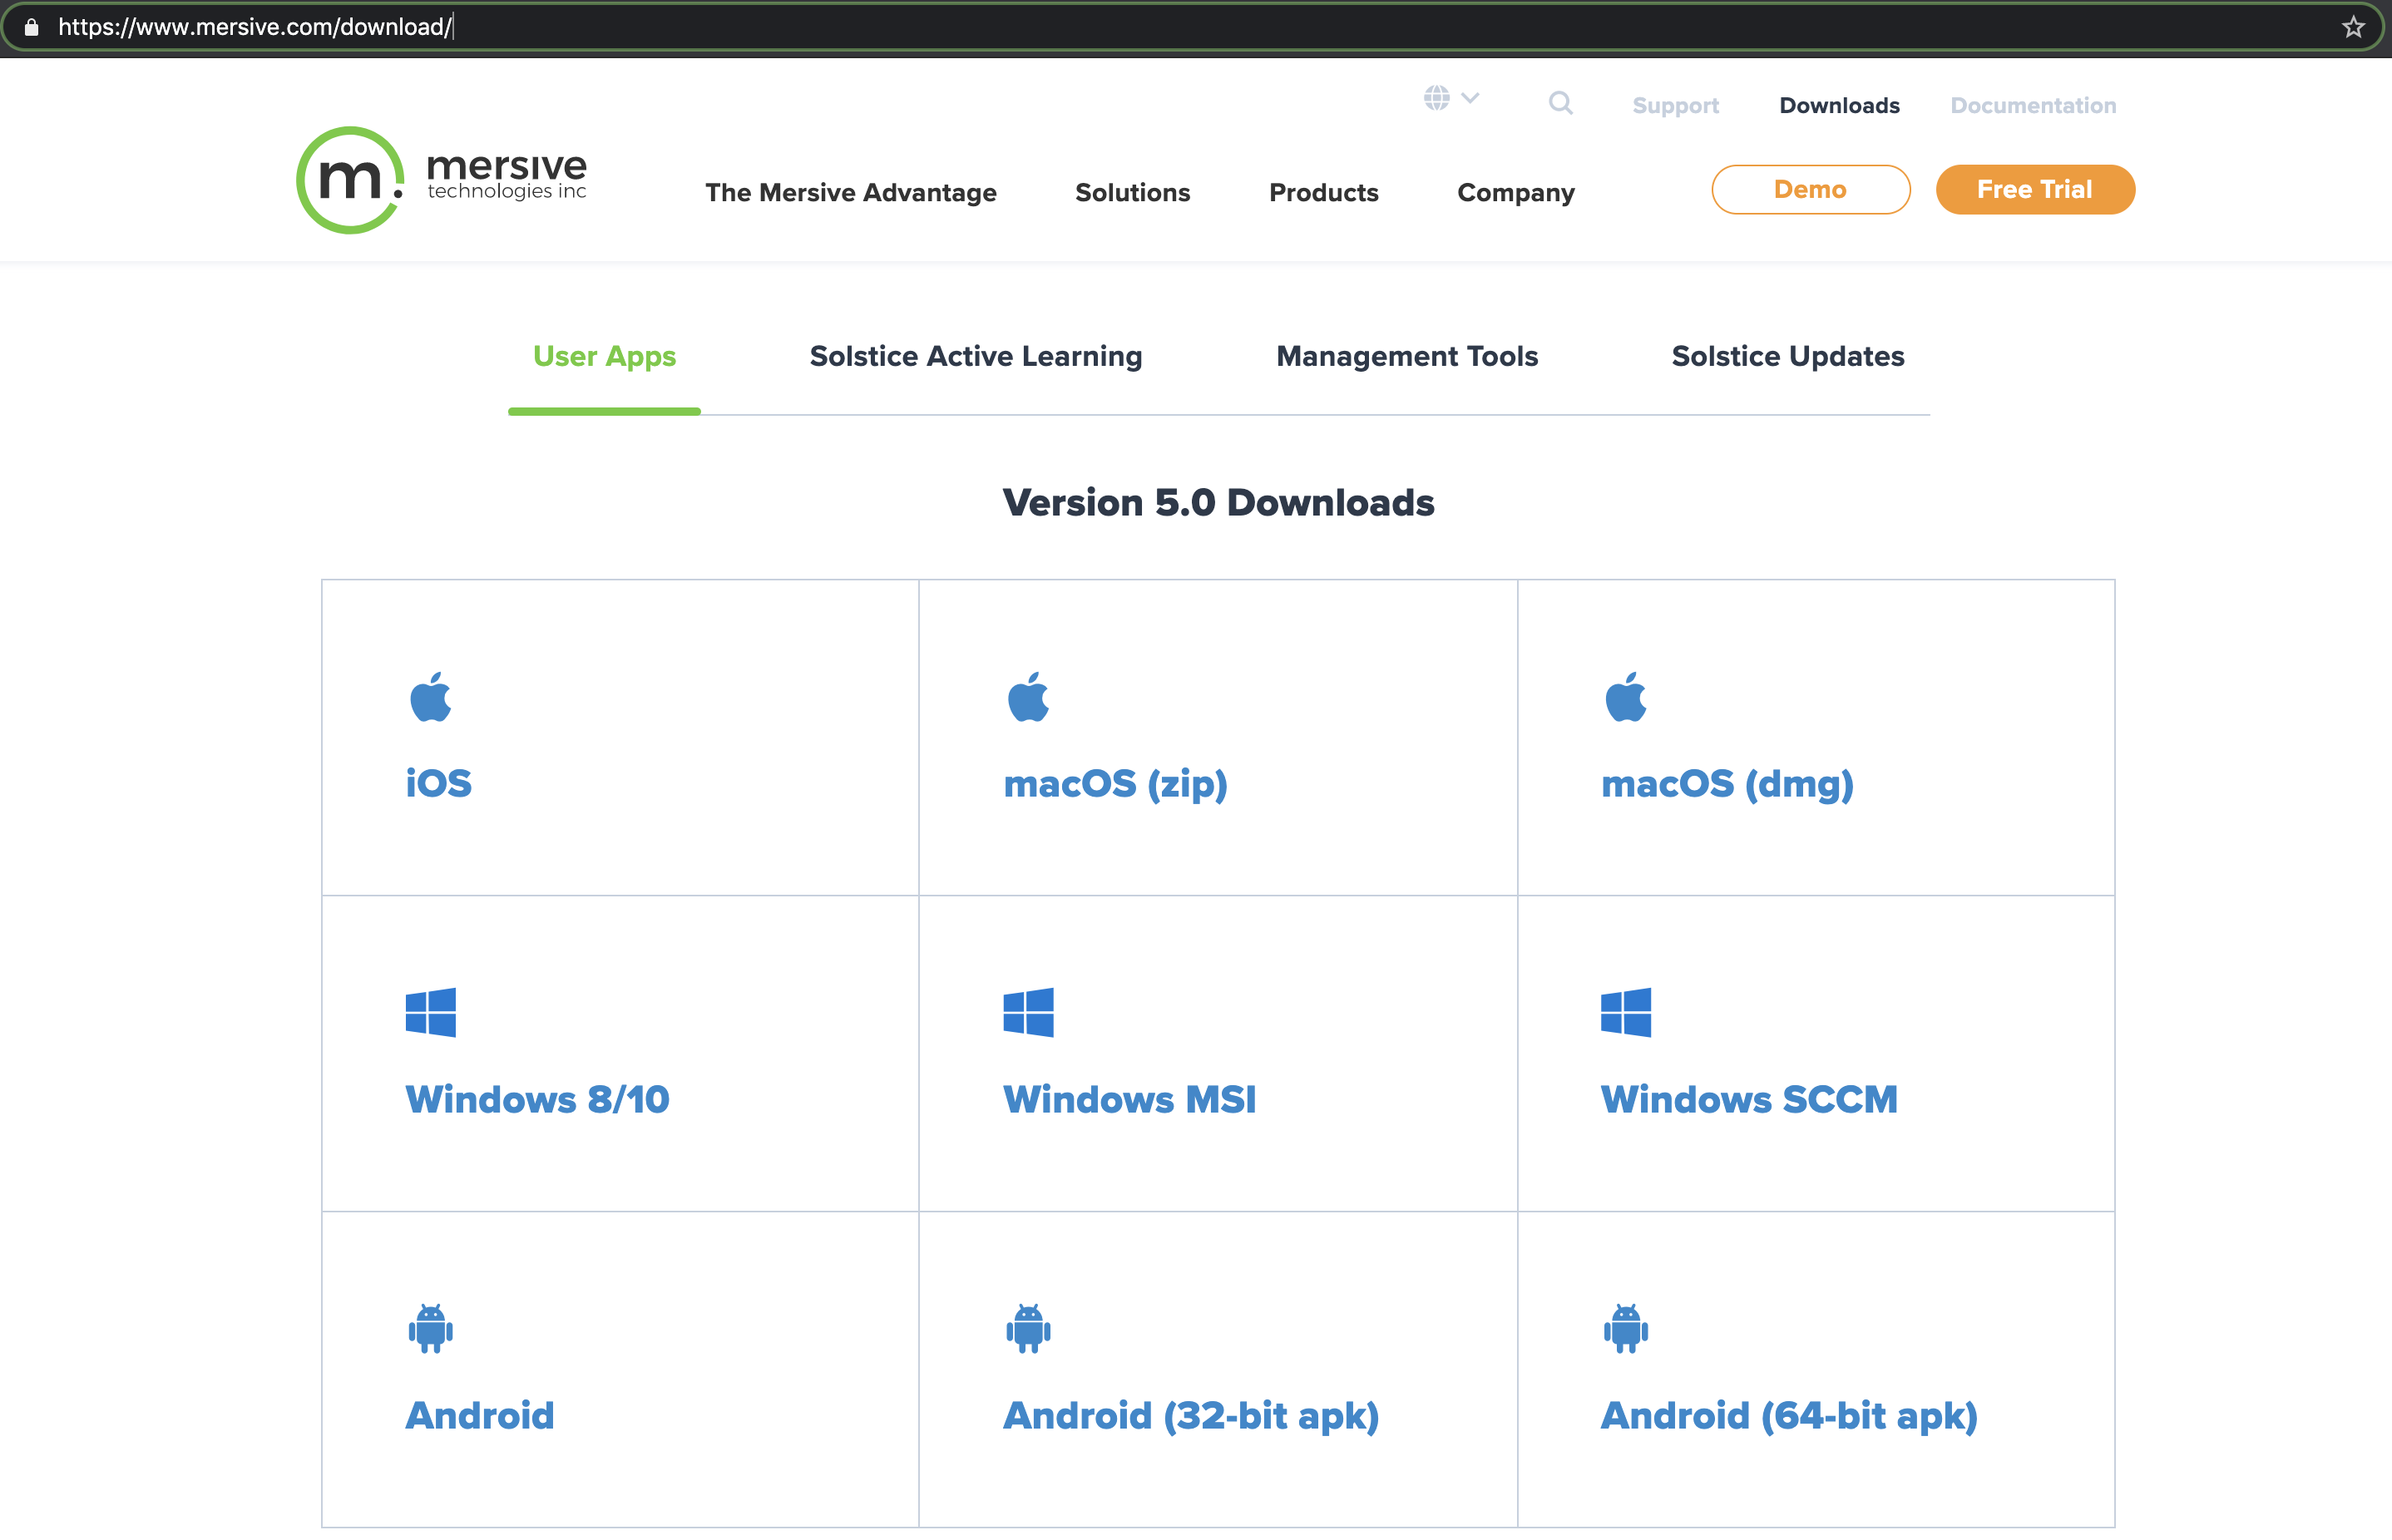
Go to https://www.mersive.com/download/ and download the latest .dmg version of the client app.
-
Double-click on the downloaded app and install by drag-and-drop into the applications folder.
-
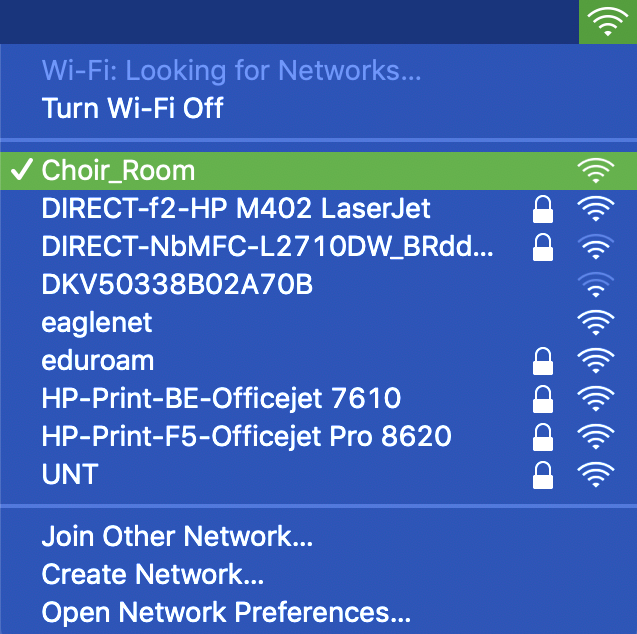
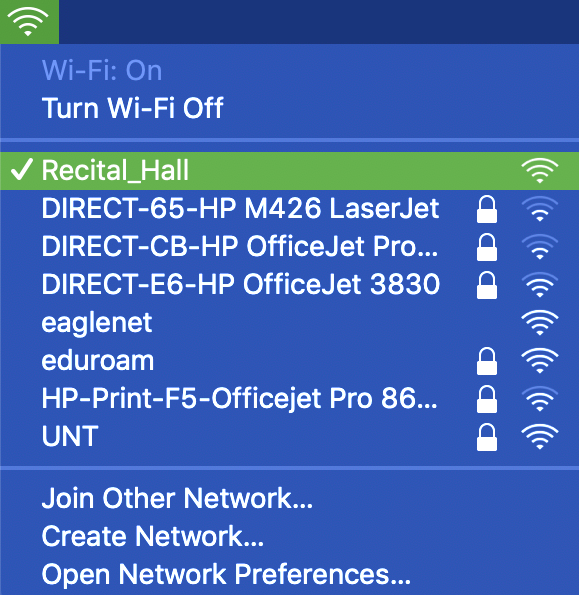
Connect your laptop to the desired WIFI:
-
“Choir_Room” for the Choir Room.

-
“Recital_Hall” for the Recital Hall.

-
-
Input the WiFi password ____ (Note that currently there is no password ).
-
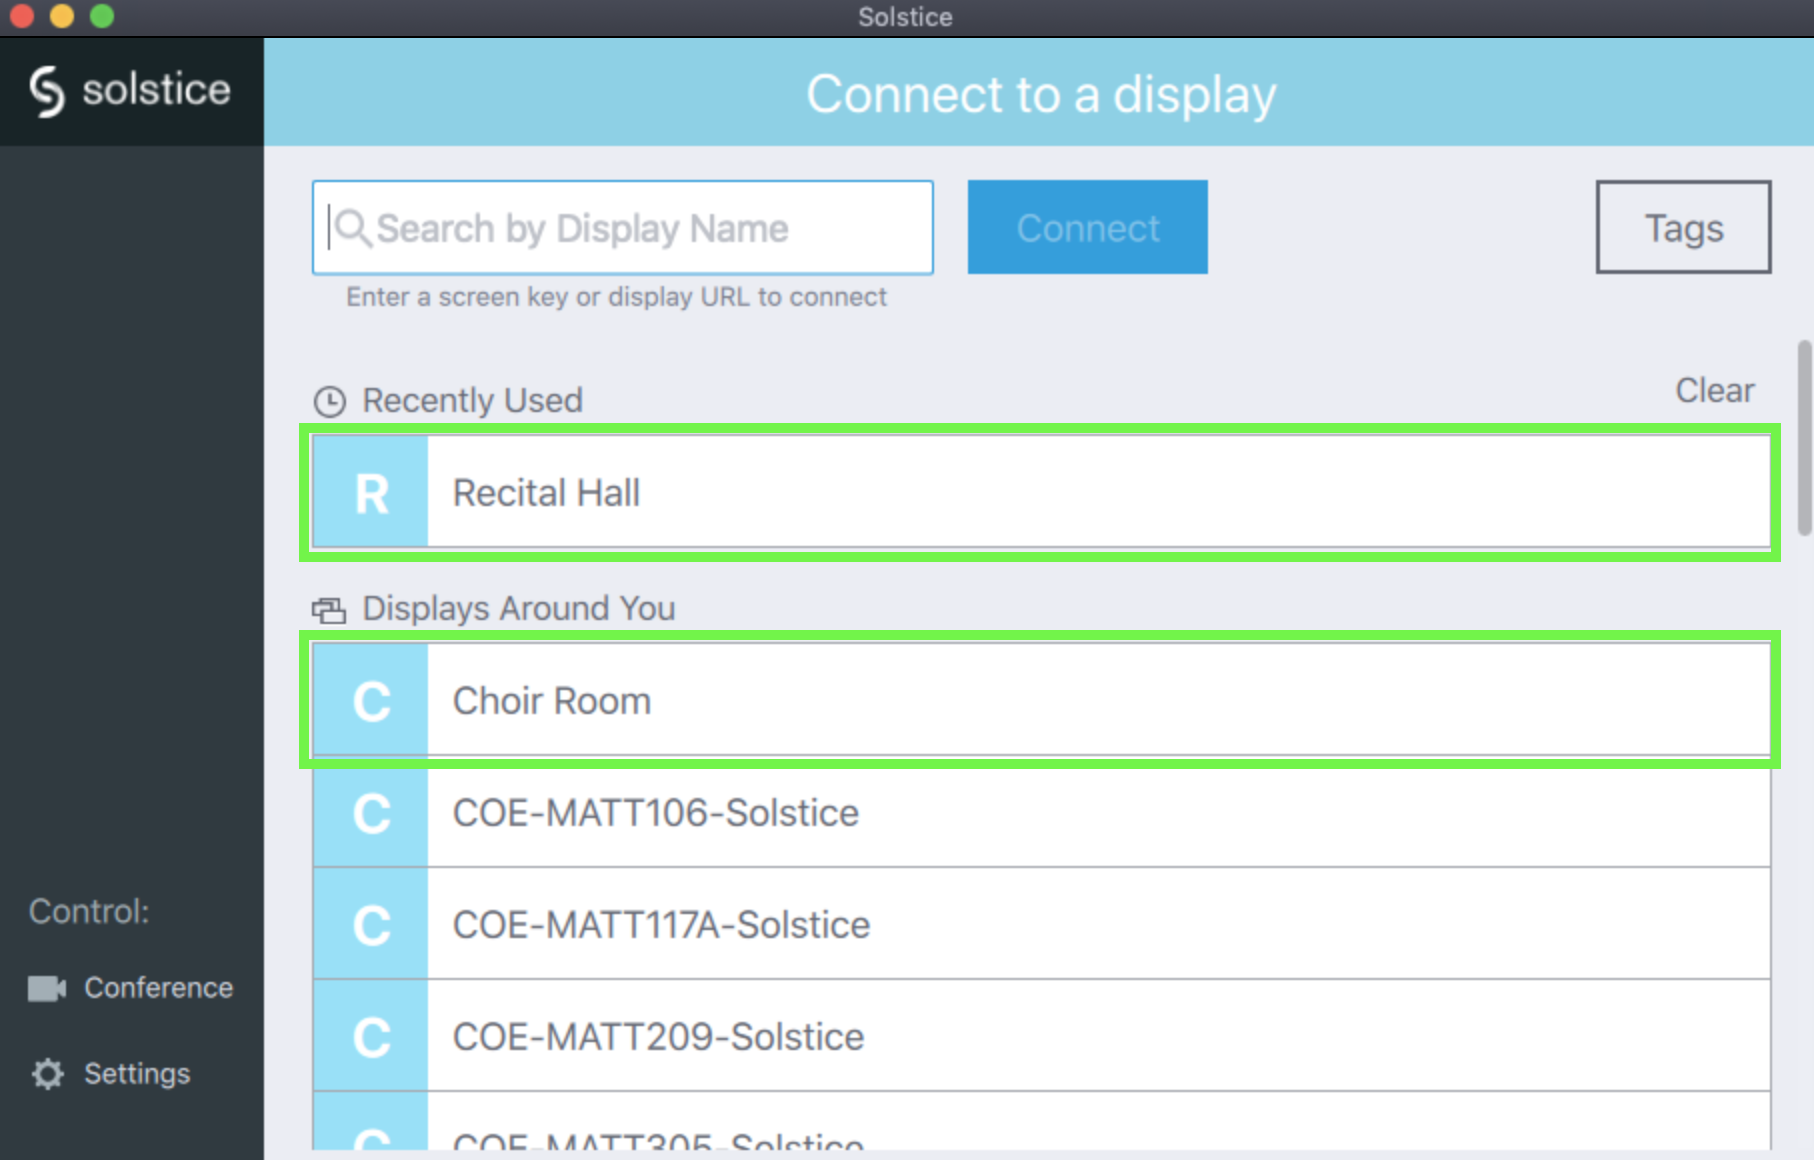
Open the Solstice Client app, find your desired hall and click on it.
-
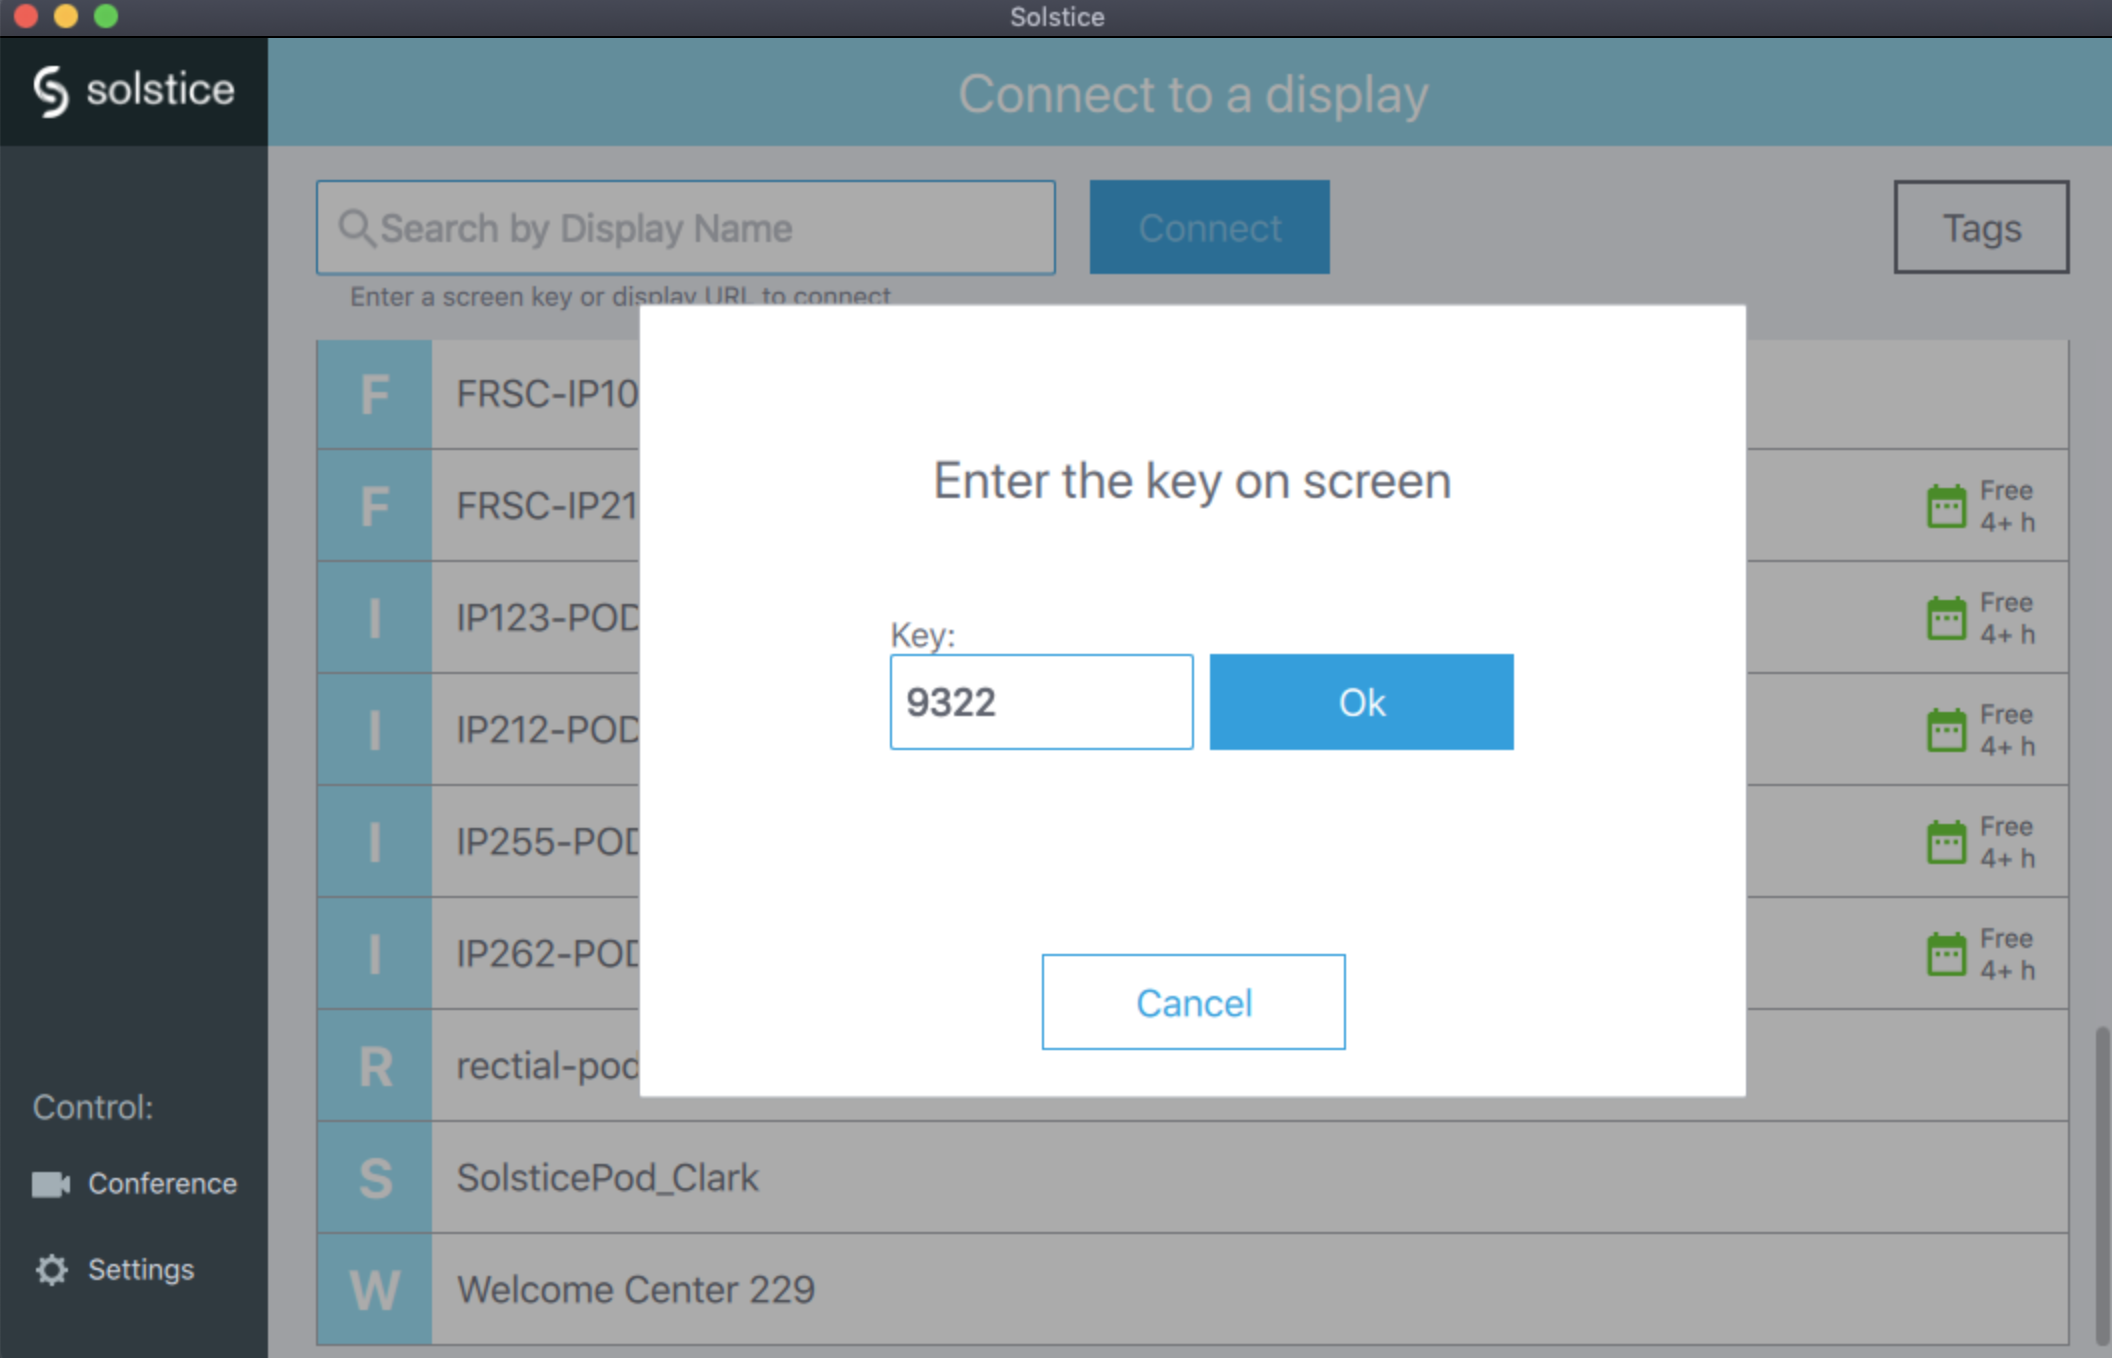
You are asked to enter a PASSWORD on your laptop. The 4-digit PASSWORD appears on the LARGE SCREEN in the hall.
Note: Very occasionally the code might not display in big letters, but it will still show either at the bottom of the screen or at the top left in a smaller font size.
-
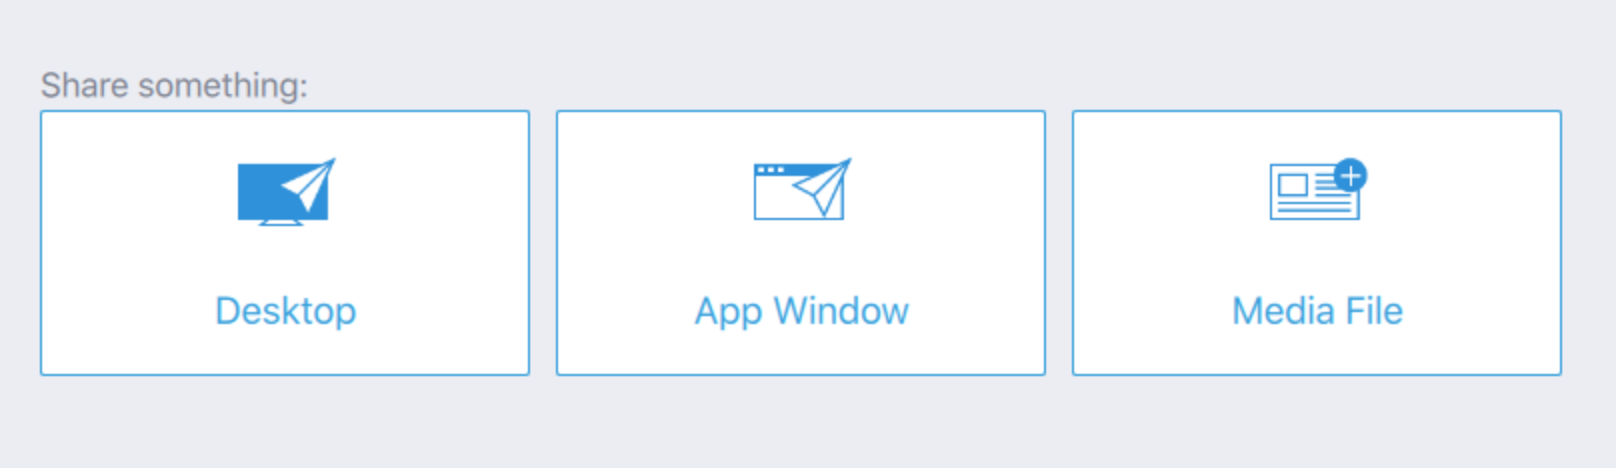
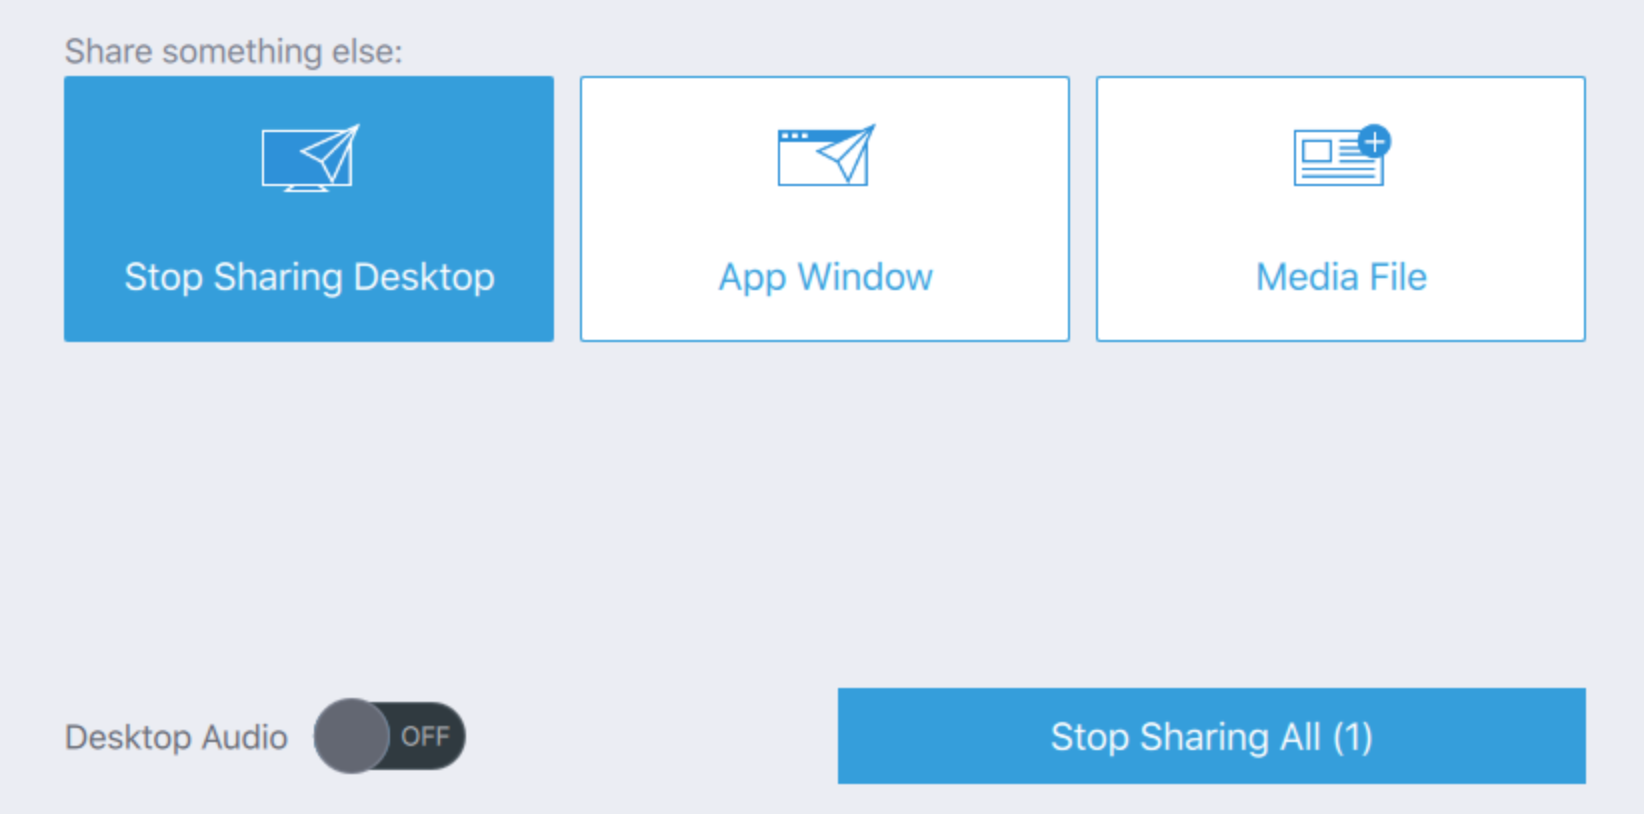
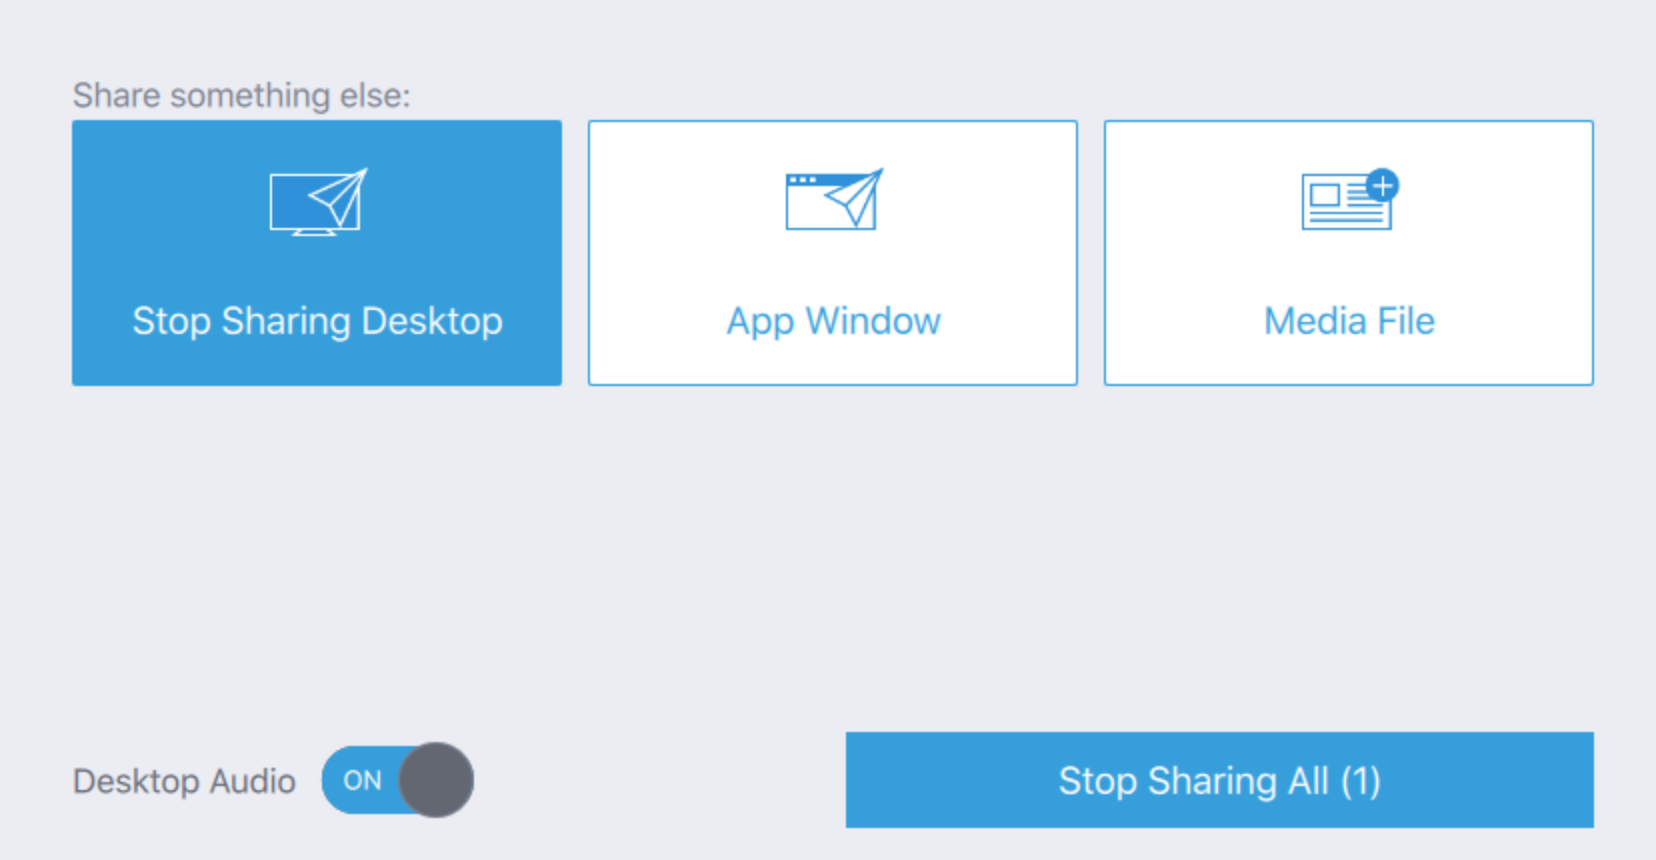
After you enter the password you can mirror your display and share it with your class by clicking on the “Desktop” icon.
Note: As soon as you do this, the app interface will shrink to a small banner at the top of your desktop. If you want to bring back the client app options you can do so by clicking on the blue “Sharing Desktop” banner. You can get rid of this ribbon in the app's settings under "Hide Solstice When Sharing Desktop" toggle.

-
If this is the first time you are using the app client you will need to enable the “Desktop Audio” option if you need sound to play along. Follow these steps:
-
Turn Desktop Audio ON.
-
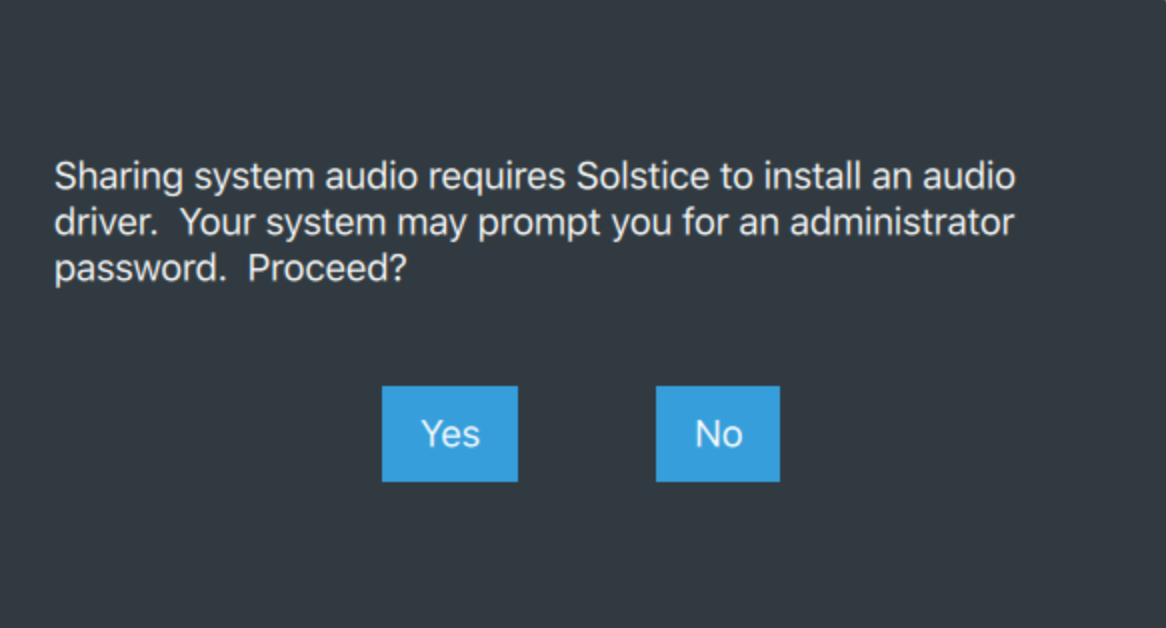
Click “Yes.”
-
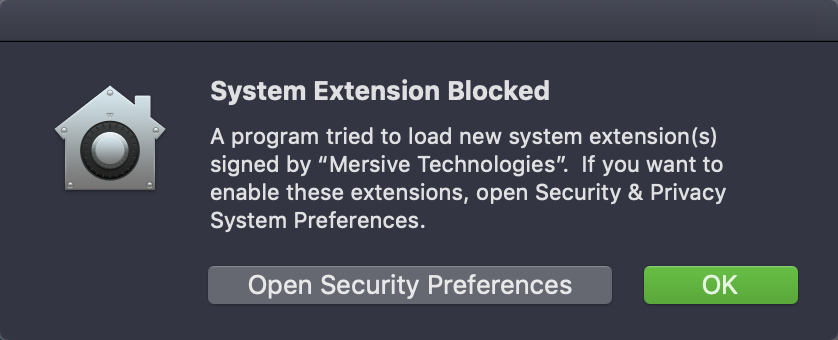
If your macOS has a security lock on, it will ask you to allow the audio driver to be installed on your laptop. Click “Open Security Preferences.”
-
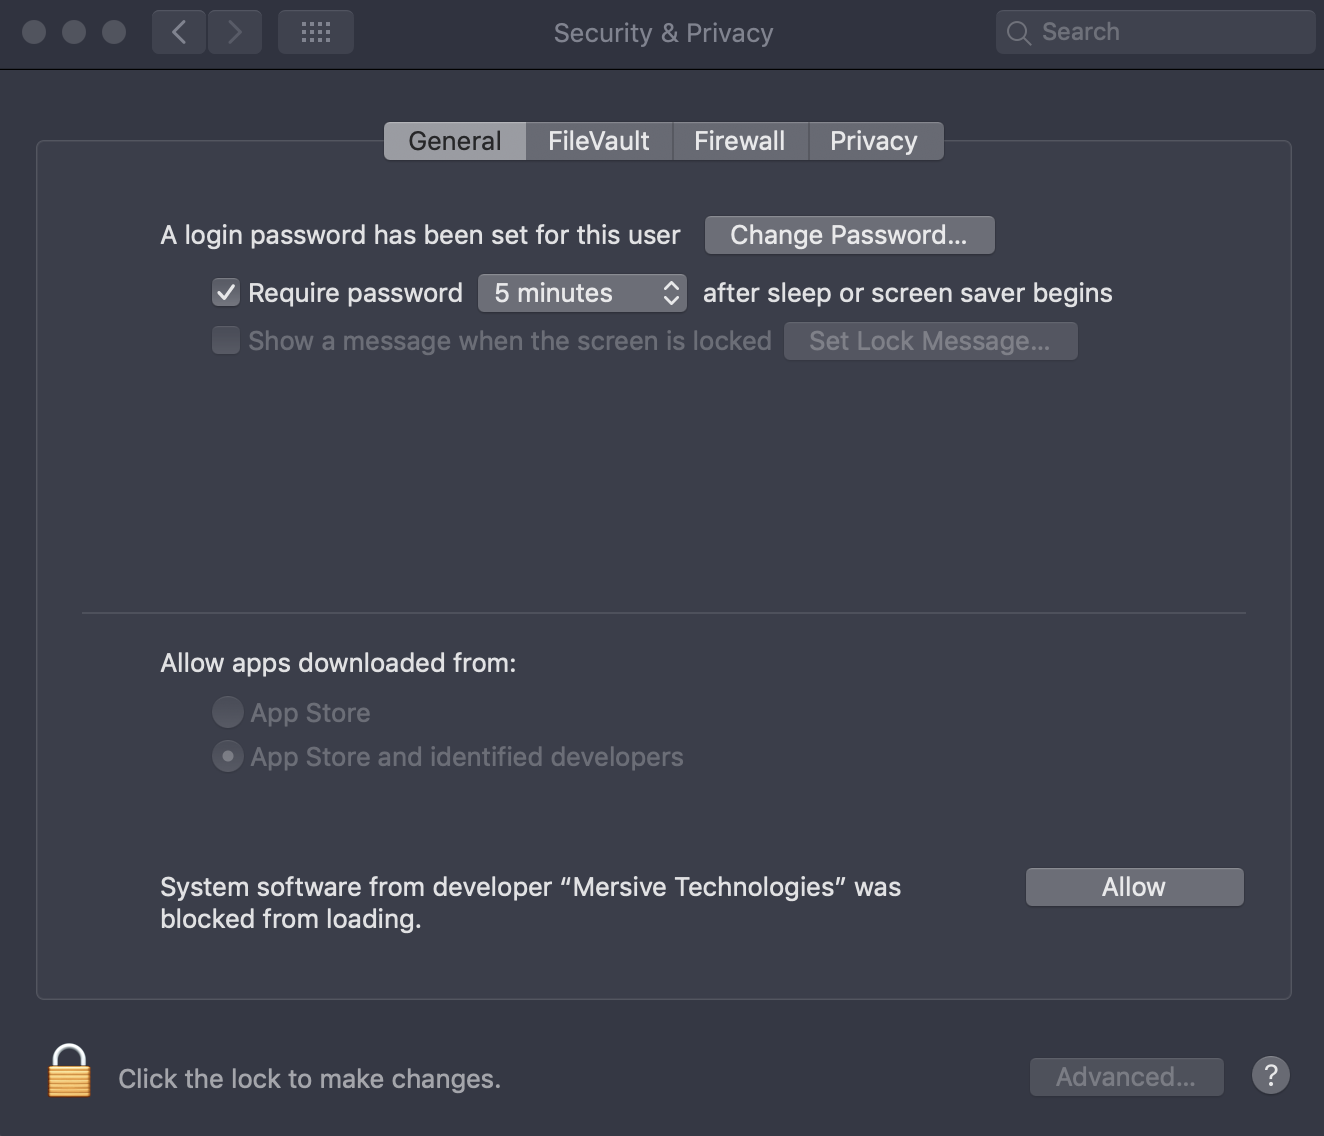
Under “Security & Privacy”, “General” tab, click Allow.
-
Done! Now you should have the option to turn the sound ON and OFF from the app.
Note: We have discovered an audio driver glitch that distorts the sound on macOS. The software developers have been contacted and might provide a fix in the near future.
-
-
You can adjust the volume of the hall speakers from your laptop.
If you need additional volume you can do so by increasing the “Laptop" volume knob on the A/V rack Mixer. Note that the knobs may change so look carfully at the mixer to identify where the "Laptop" knobs (Left+Right) are located.
-
- Windows
-
Go to https://www.mersive.com/download/ and download the latest windows 8/10 version of the client app.
-
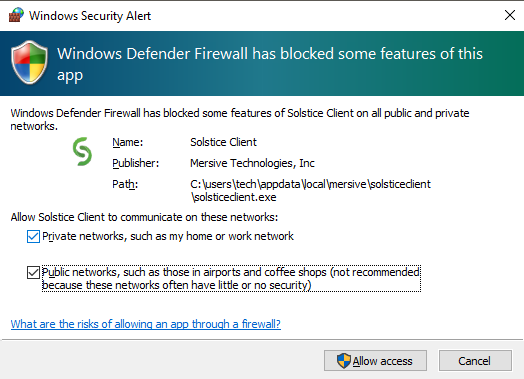
Double-click on the downloaded file and install. You may be asked to allow access by your firewall program.
-
Connect your laptop to the desired WIFI:
-
“Choir_Room” for the Choir Room.
-
“Recital_Hall” for the Recital Hall.
-
-
Input the WiFi password ____ (Note that currently there is no password for testing reasons).
-
Open the Solstice Client app, find your desired hall and click on it.
-
You are asked to enter a PASSWORD on your laptop. The 4-digit PASSWORD appears on the LARGE SCREEN in the hall.
Note: Very occasionally the code might not display in big letters, but it will still show either at the bottom of the screen or at the top left in a smaller font size.
-
After you enter the password you can mirror your display and share it with your class by clicking on the “Desktop” icon.
Note: As soon as you do this, the app interface will shrink to a small banner at the top of your desktop. If you want to bring back the client app options you can do so by clicking on the blue “Sharing Desktop” banner. You can get rid of this ribbon in the app's settings under "Hide Solstice When Sharing Desktop" toggle.
-
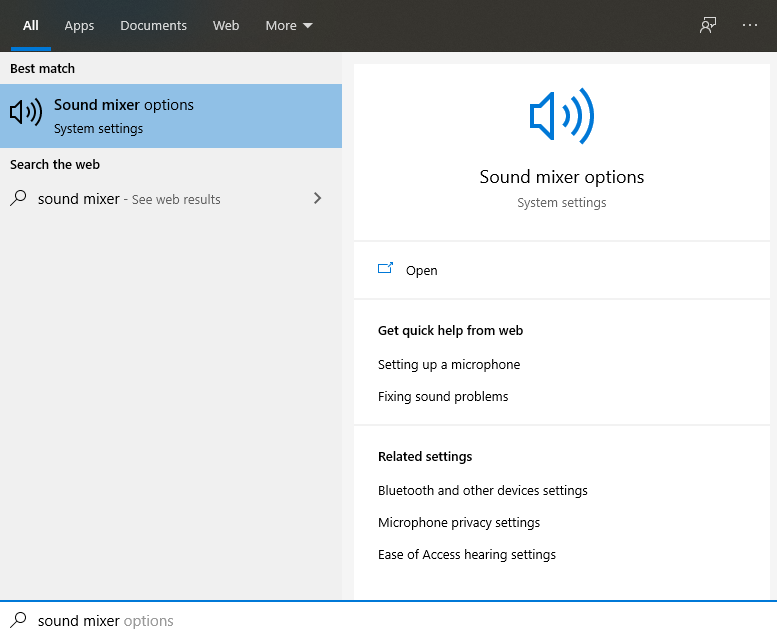
BE CAREFUL! The first time you share your screen you will output full volume. You can lower your laptop's volume through the windows "sound mixer" settings. Follow these steps:
-
Search for "Sound Mixer Options."
-
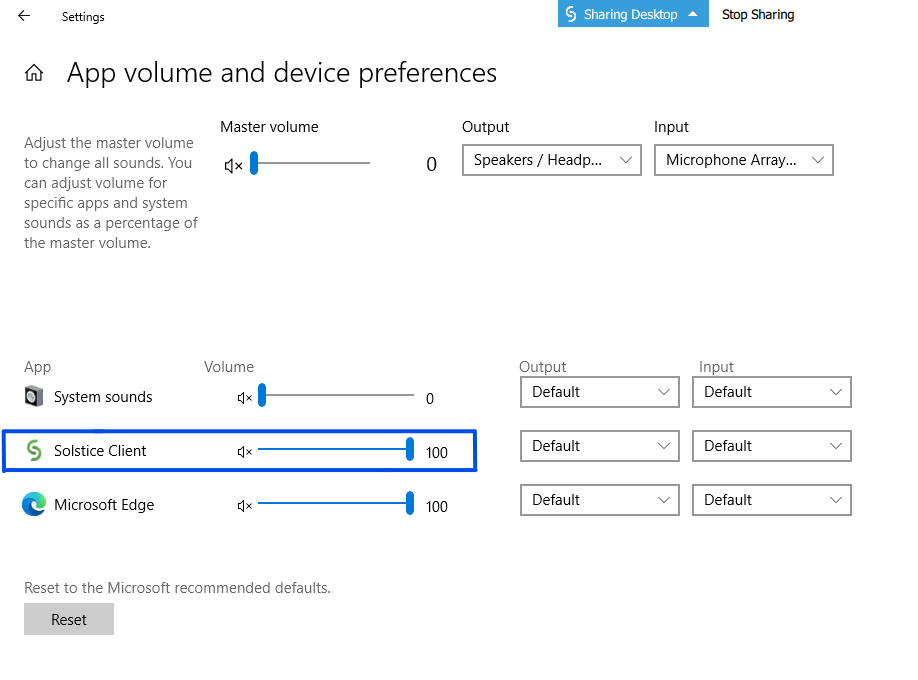
Once opened, you should be able to see the "Solstice Client" app volume control. Adjust it accordingly.
-
-
If you need additional volume you can do so by increasing the “Laptop" volume knob on the A/V rack Mixer. Note that the knobs may change so look carfully at the mixer to identify where the "Laptop" knob is located.
-
- macOS: AirPlay Option
- Help! The wireless connection is not working, can I connect physically instead?
No worries, there is an additional physical HDMI cable connection which you can use at any time.
-
Locate the HDMI cable to the left of the AV rack in Recital Hall, or on top of the AV rack in the Choir Room.
-
Connect the HDMI cable to your laptop's HDMI port. Done!
Please note that newer macOS laptops need a USB-C to HDMI adapter. If you don't have such an adapter one can be temporarily checked out from the lab desk. -
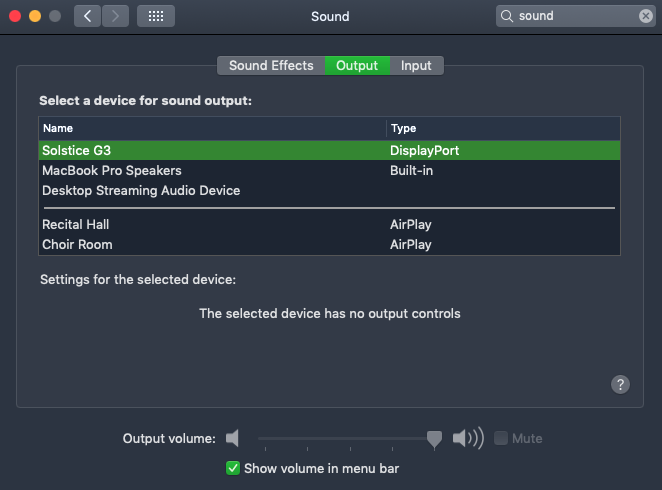
If you also want to play audio through the hall speakers, make sure that you change the audio output settings/preferences as follows:
-
macOS: Change your sound output destination to "Solstice G3."
BE CAREFUL! Although you can control the individual volume of your applications (e.g. Itunes, YouTube etc.), your macOS system volume will be disabled and at full volume. Please adjust the physical "Laptop" and "Master" volume knob in the AV rack mixer to the desired level before proceeding further (start with both knobs at 12 or 1 o'clock for a standard setting).
-
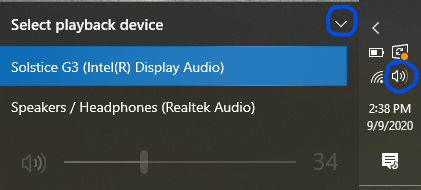
Windows: Change your sound output destination to "Solstice G3" audio. Done! You can now control your volume regularly through your laptop.
-
-
- Before your class
LIGHTING INSTRUCTIONS
Below find the instructions on how to use our Lighting Systems in the College of Music.
- Recital Hall
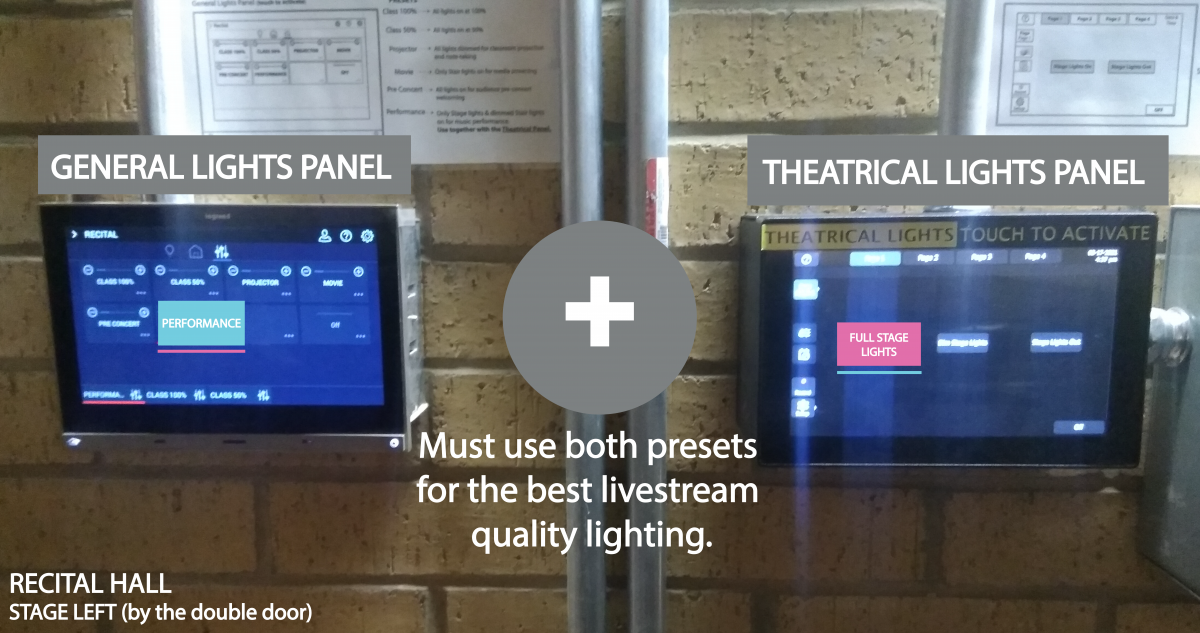
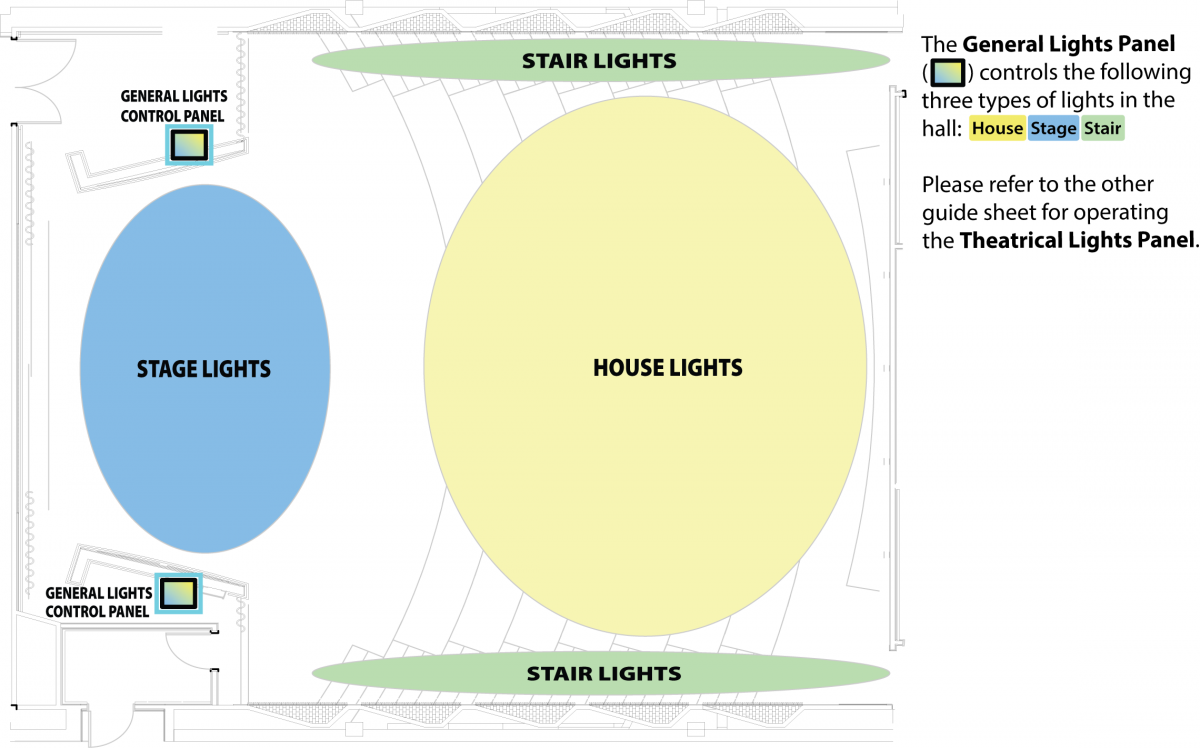
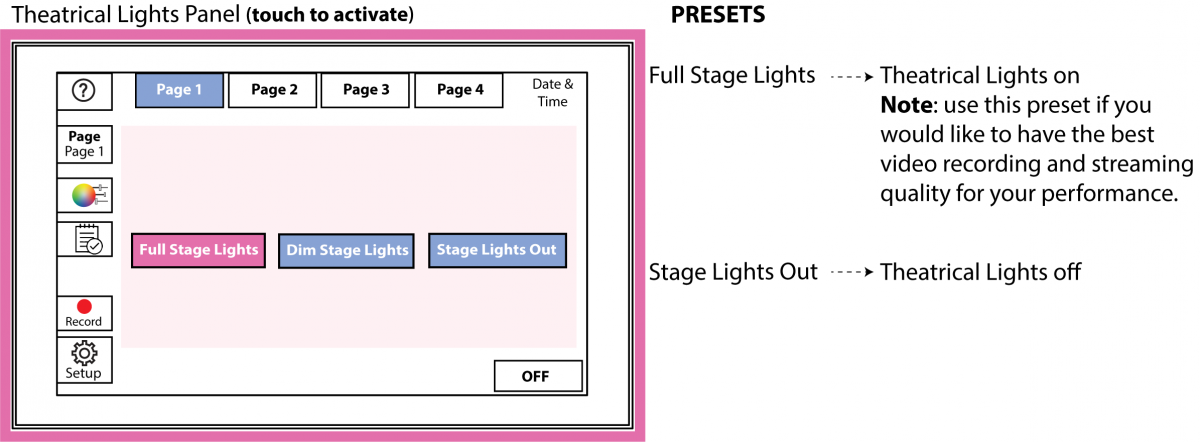
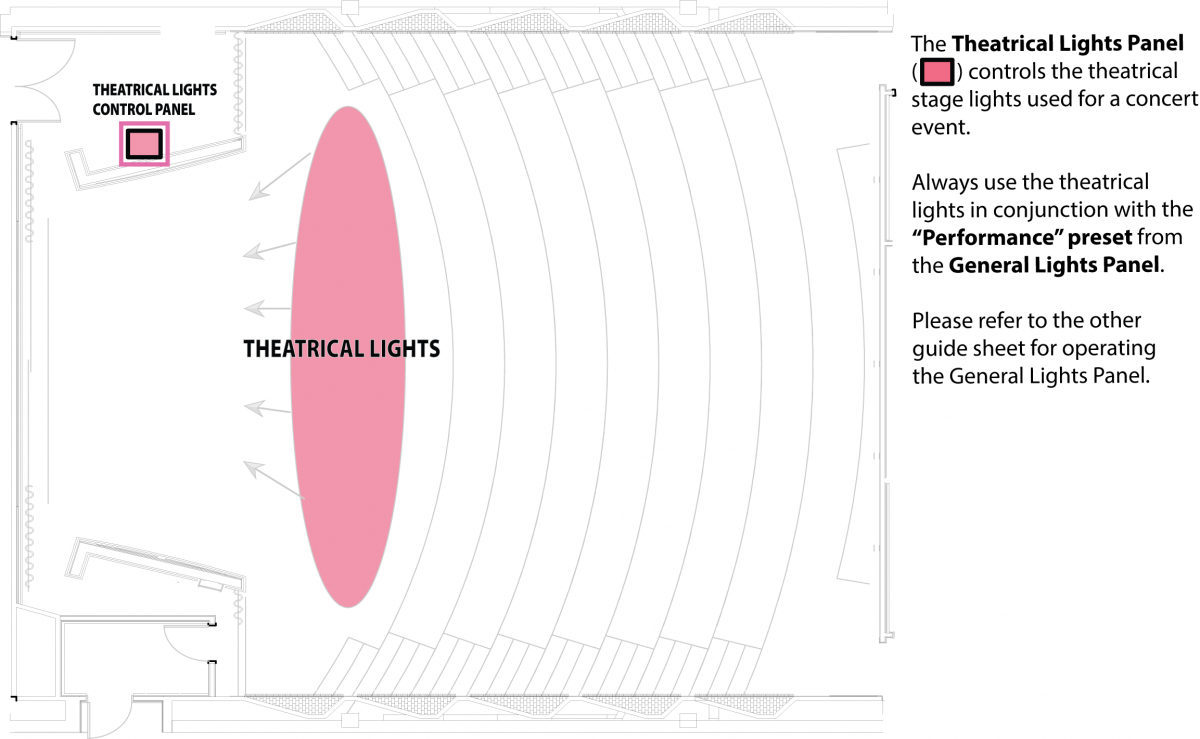
For the best livestream concert look, please use both the Performance AND Full Stage Lights presets. Both presets need to be on, otherwise, your recorded event will look too dark.
Feel free to also watch our short instructional videos on how to control the General and Theatrical lights panels.
Read more detailed information below.
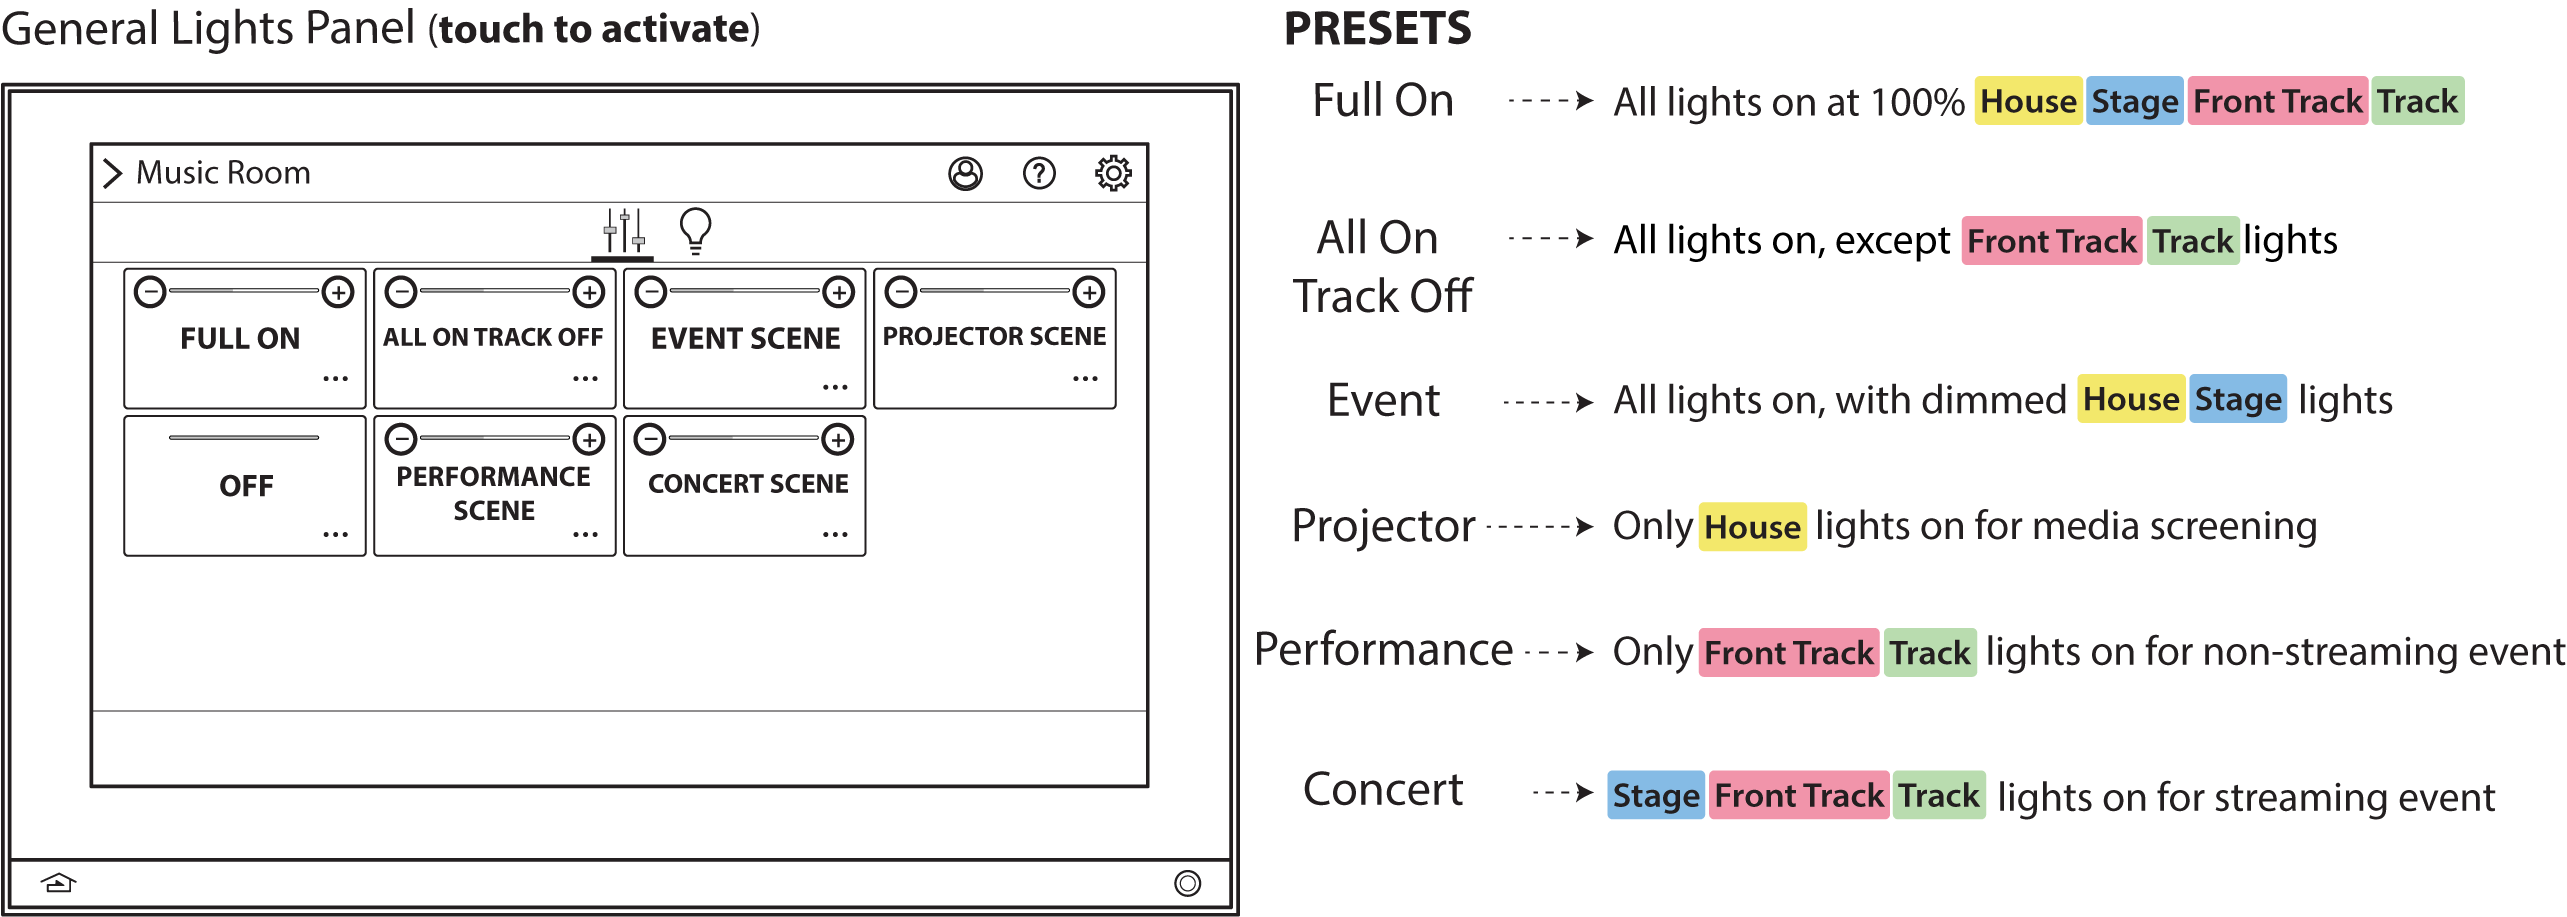
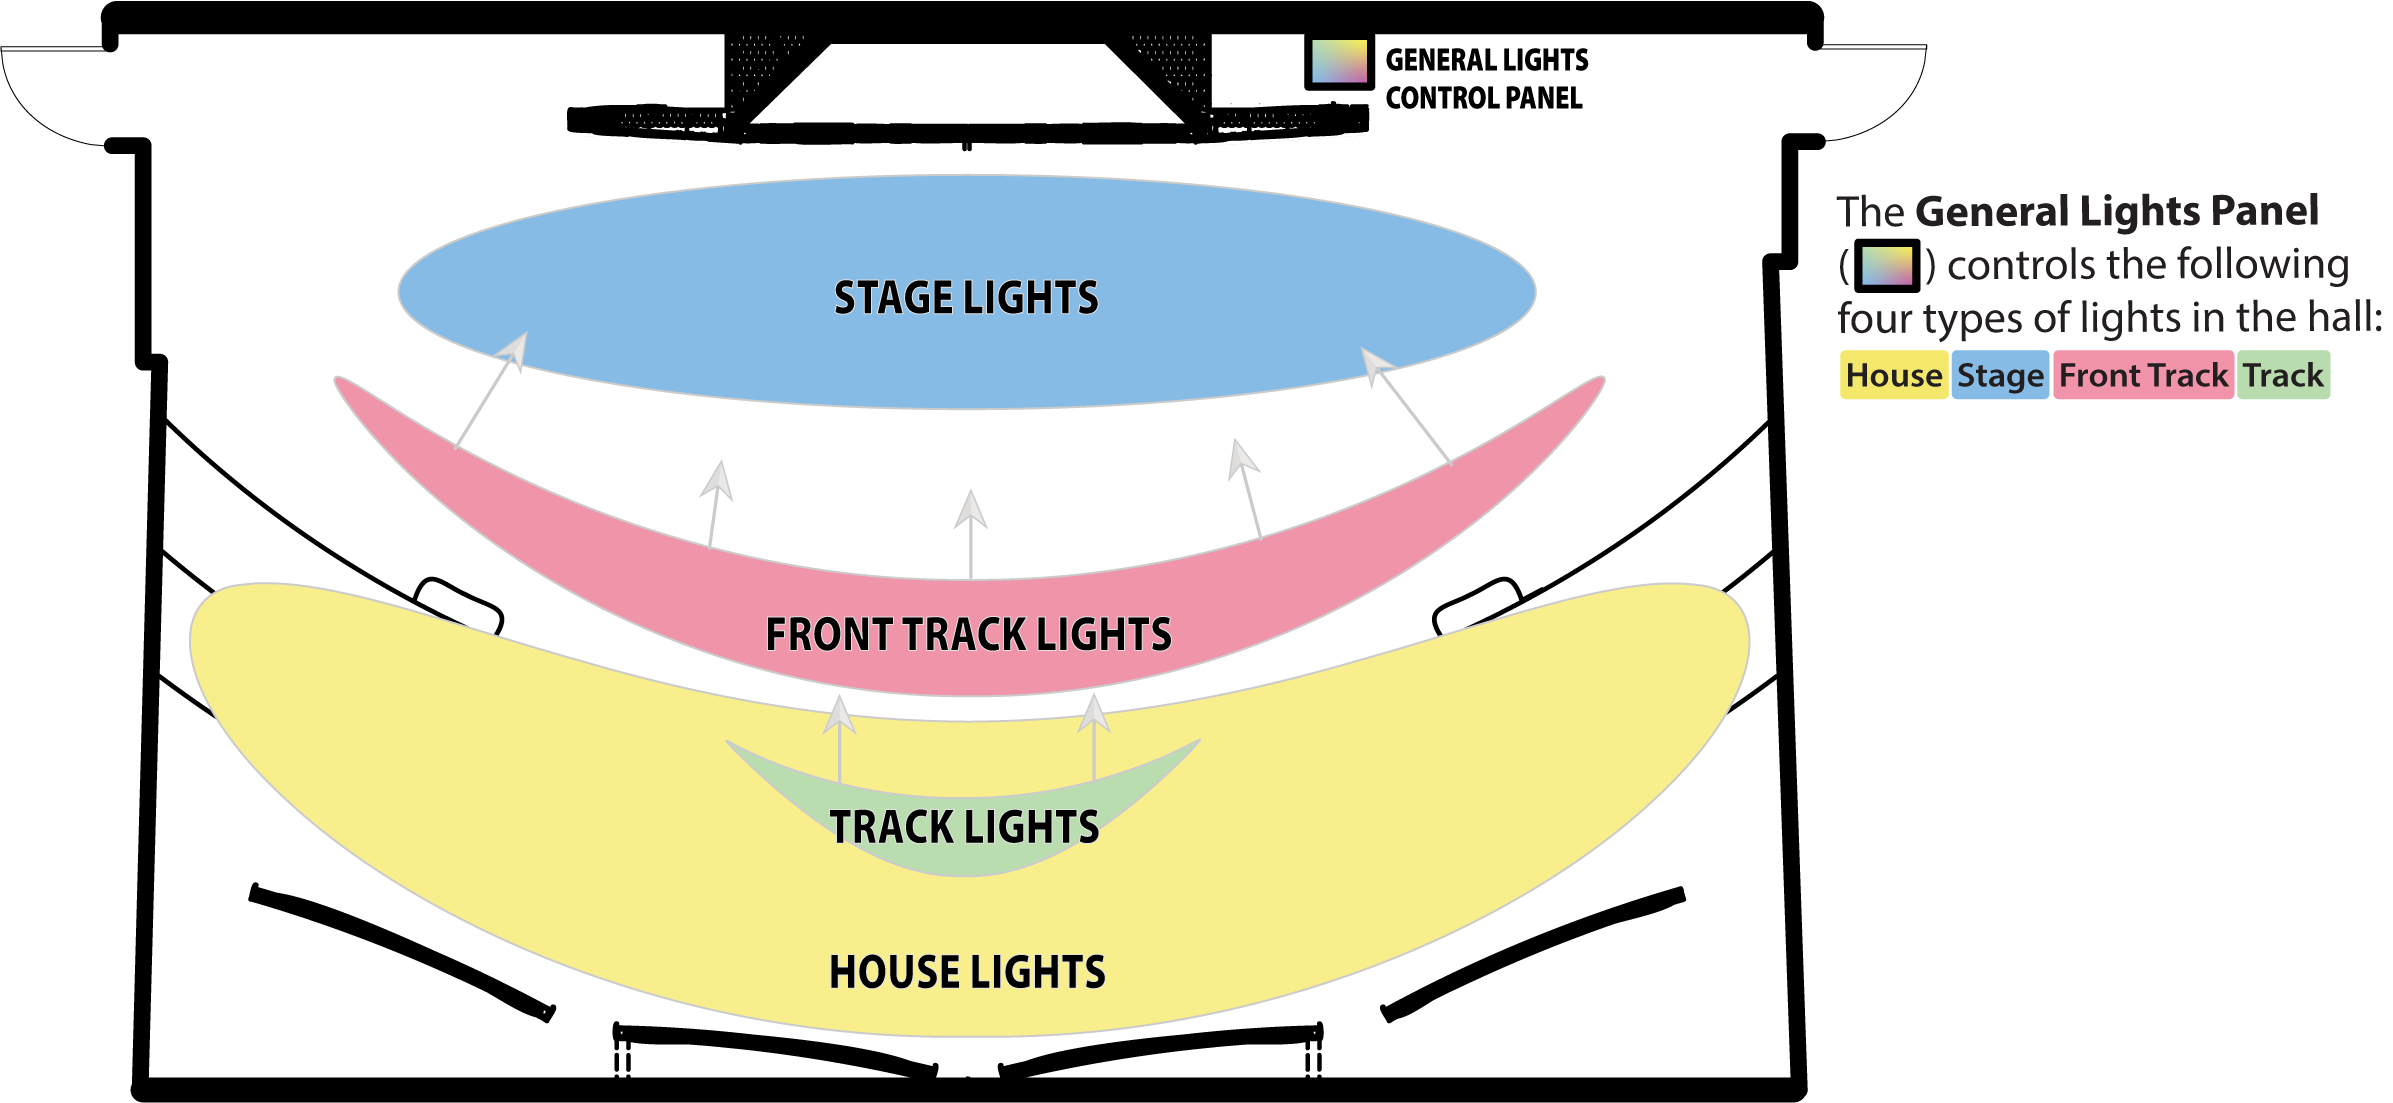
The preset lighting system in Recital Hall is controlled via two touchscreen panels. The "General Lights Panel" controls the majority of lights and is the panel that should be used for regular classroom teaching, presentations, movie projection, rehearsals etc. The "Theatrical Lights Panel" controls additional stage lights appropriate for a concert performance or other special event.

- Choir Room
The preset lighting system in the Choir Room is controlled by a single touchscreen panel. This "General Lights Panel" controls all the lights and is the panel that should be used for regular classroom teaching, presentations, rehearsals, concert performances etc.
For adequate stage lighting please use the "Concert Scene" preset, otherwise your livestream and recorded event will look too dark.
Please note that the Recital Hall, Choir Room, and Voertman Hall (when used for basic 1-2 mics amplification needs) are considered self-service spaces. Faculty, staff and students are responsible for turning on all audio/lighting themselves as well as shutting things down. They are also responsible for reviewing this AV website prior to use and picking up the needed equipment.
We welcome any additional feedback for further improving the system's operation and/or guidelines page HERE.